풀스택 웹🌐 개발자 지망생 🧑🏽💻
➕ 인공지능 관심 🤖
Categories
-
┣
▶ COMPUTER_SCIENCE
📂: 7 -
┣
▶ WEB
📂: 3 -
┣
▶ ETC
📂: 3-
┃
┣
ETCS
📄: 10 -
┃
┣
SUBBRAIN 개발기
📄: 5 -
┃
┗
YOS 개발기
📄: 1
-
┃
┣
-
┗
▶ AI
📂: 9-
┣
AITOOLS
📄: 3 -
┣
CV
📄: 2 -
┣
DEEP_LEARNING
📄: 1 -
┣
DATA_VIS
📄: 2 -
┣
GRAPH
📄: 1 -
┣
LIGHTWEIGHT
📄: 1 -
┣
MATH
📄: 1 -
┣
NLP
📄: 3 -
┗
STRUCTURED_DATA
📄: 2
-
┣
Jenkins 간단 설명 및 설치
Jenkins 간단 설명 및 설치

Jenkins 는 오픈소스 자동화 서버로, 플러그인과 파이프라인을 이용해 손쉽게 빌드와 배포, 테스트 자동화 등을 이뤄낼 수 있다.
Jenkins는 Jenkins가 설치된 마스터 노드가 에이전트 노드를 생성해서 업무를 맡기는 구조이므로, 에이전트로 AWS EC2 인스턴스나 Docker Container를 사용할 수 있다.
Jenkins 설치
1. 도커를 이용한 설치
Linux, Windows 등의 특정 운영체제의 설치방법도 존재하지만, 설정 등의 편의를 위해 주로 Docker를 설치하고 DinD 구조 Jenkins 컨테이너를 설치한다.
docker run -it -p 8080:8080 jenkins/jenkins:lts -v /home/${myname}/jenkins_compose/jenkins_configuration:/var/jenkins_home /var/run/docker.sock:/var/run/docker.sock
만일, dind 구조나 blue-ocean 를 사용하지 않을 거라면 위와 같은 코드로 설치 가능
2. 암호 설정
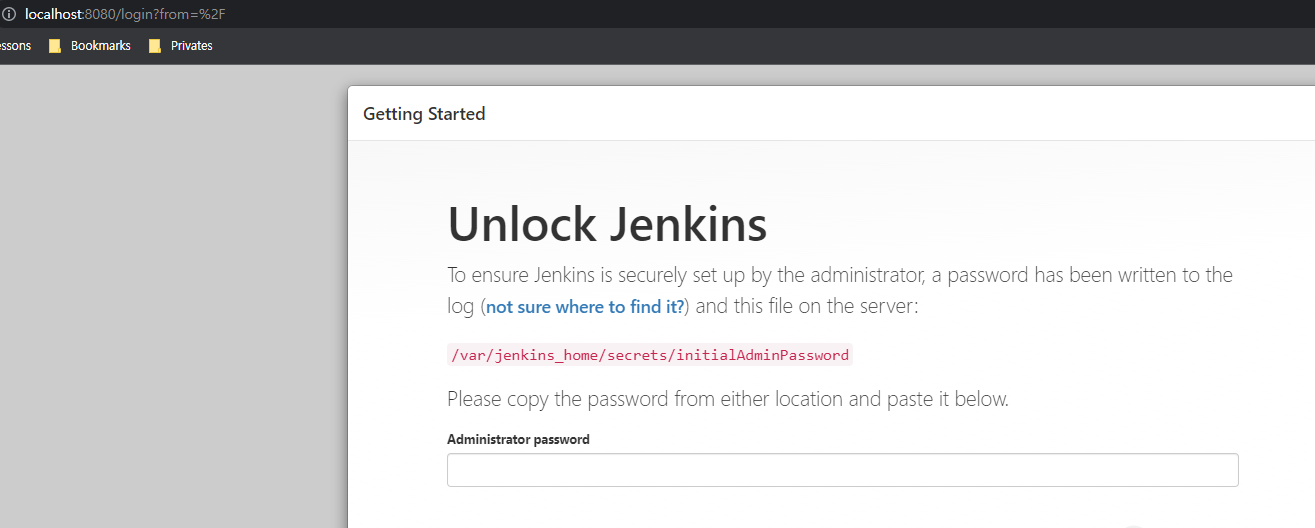
이후 연결된 포트번호로 들어가면 위와 같은 화면이 나타난다.
$docker logs your_container_name

*************************************************************
*************************************************************
*************************************************************

Jenkins initial setup is required. An admin user has been created and a password generated.
Please use the following password to proceed to installation:

{$some_random_password}

This may also be found at: /var/jenkins_home/secrets/initialAdminPassword

*************************************************************
*************************************************************
*************************************************************
만약, 설정시 출력되는 initialpassword를 숙지하지 못했다면 위와 같은 커맨드로 {$some_random_password} 부분을 복사하면 된다.
3. 플러그인 설치 및 어드민 설정
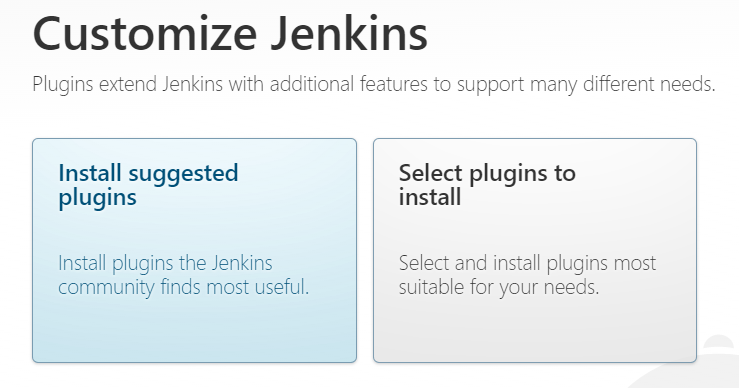
이후 플러그인을 설치하면된다. 좌측의 기본 설정으로 OK
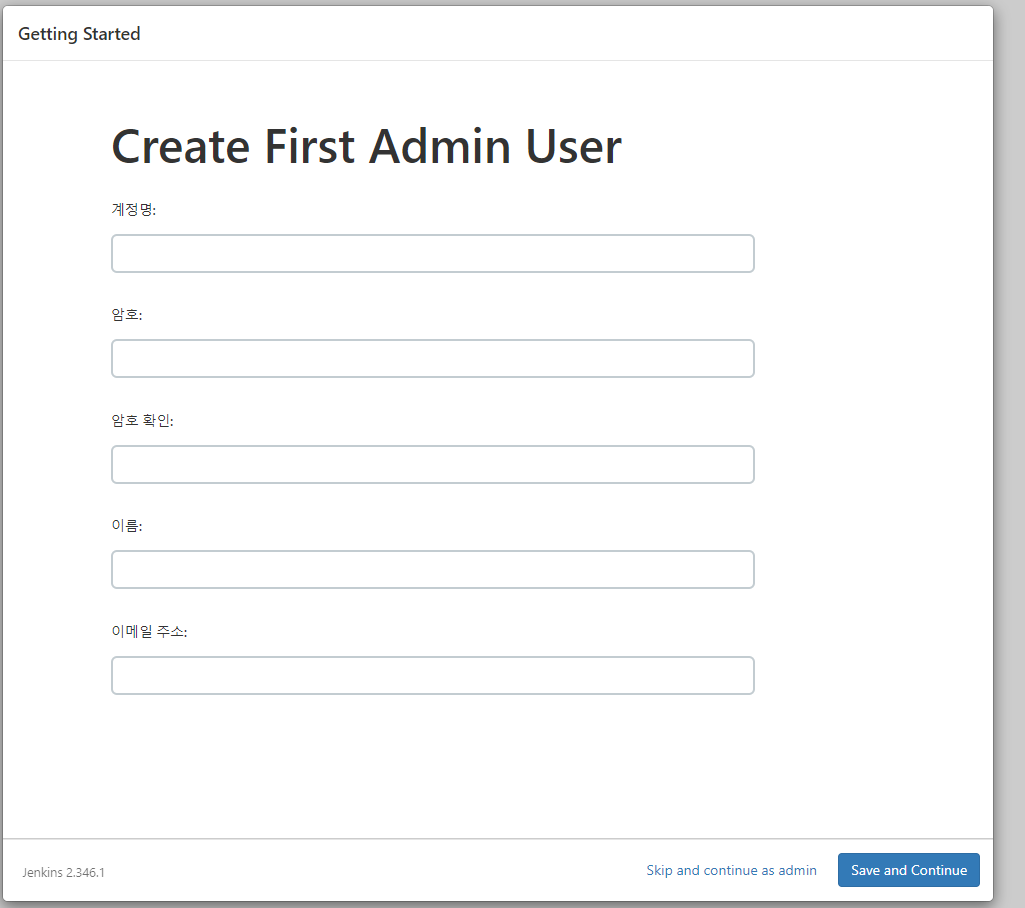
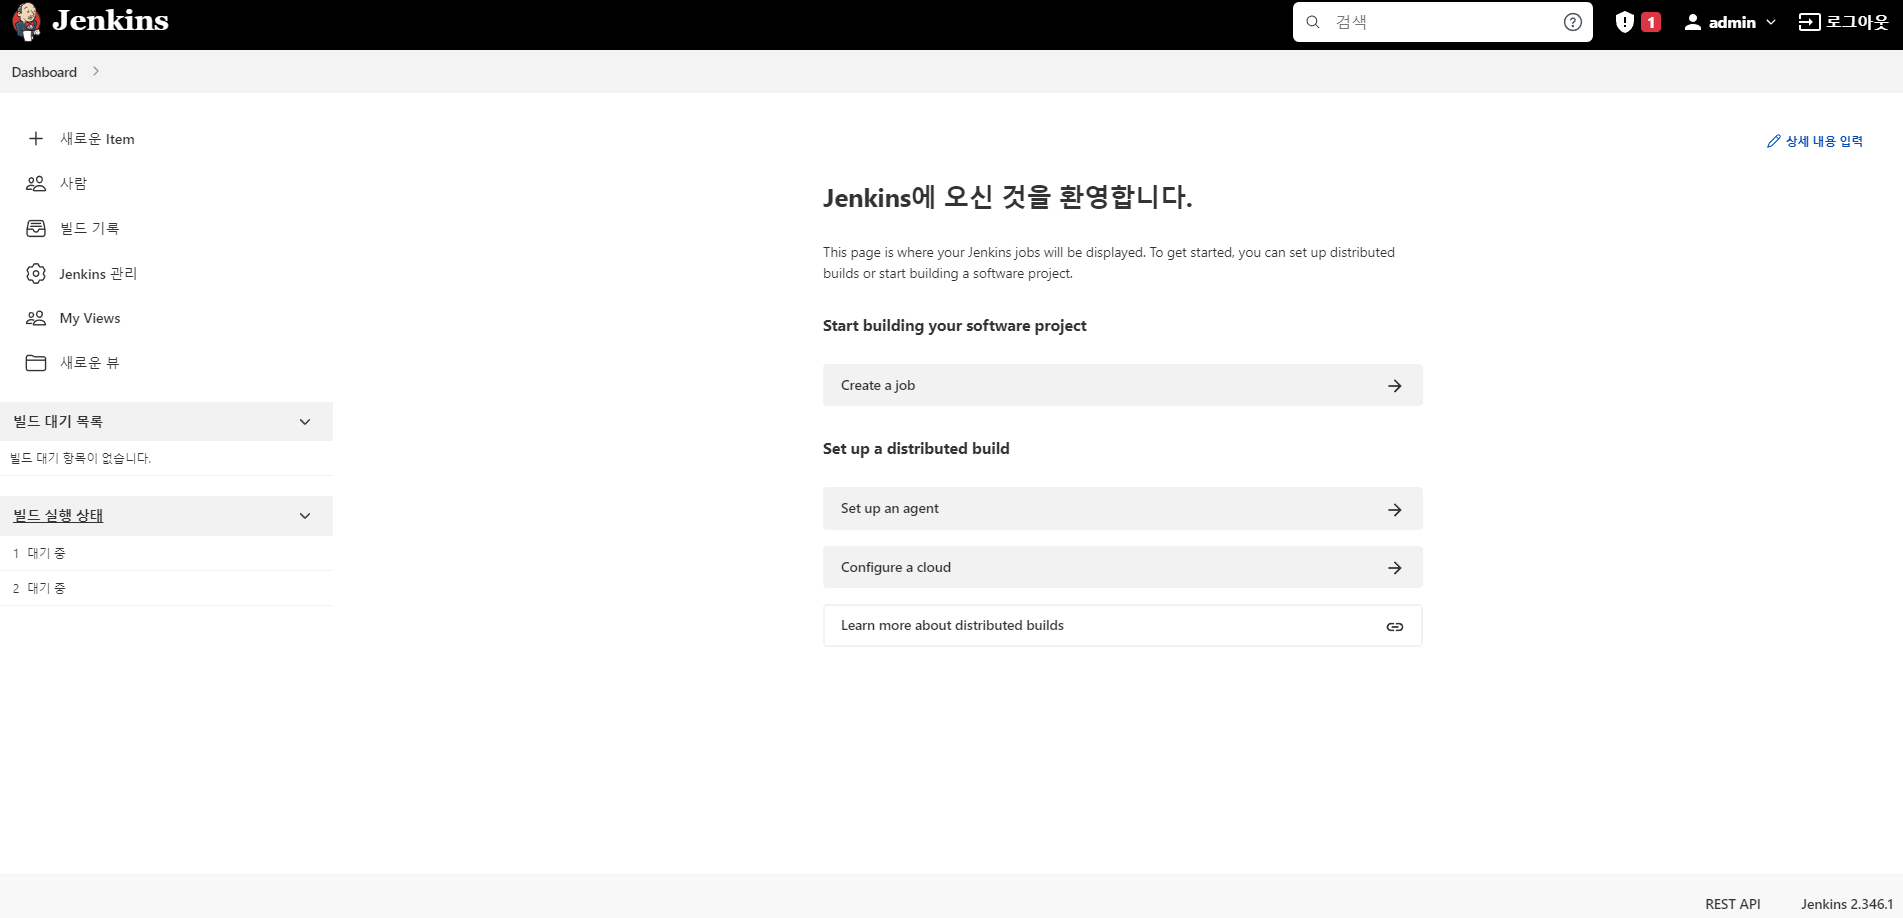
이후, 계정을 생성하고 URL을 설정하는 창을 지나면 아래와 같은 메인 화면을 볼 수 있다.
Install Jenkins : Docker Container with docker-compose
만약 docker-compose가 설치되어 있다면 아래와 같이 docker-compose.yaml 파일을 작성하고 docker-compose up -d 명령어로 손쉽게 실행 가능하다.
# docker-compose.yaml
version: '3.8'
services:
  jenkins:
    image: jenkins/jenkins:lts
    privileged: true
    user: root
    ports:
      - 8080:8080
      - 50000:50000
    container_name: jenkins
    volumes:
      - /home/${myname}/jenkins_compose/jenkins_configuration:/var/jenkins_home
      - /var/run/docker.sock:/var/run/docker.sock
-
앞선
volumes의/home/${myname}/jenkins_compose/...부분은 운영체제나 설정에 따라 바꿔줘야한다. -
포트는 8080번과 50000번이 열려있으니 자유롭게 바꿔주자.
-
priviledged설정이 되있어 보안상 위험할 수 있으니, 원한다면 유저그룹 권한을 설정해주자.
마찬 가지로 초기 암호는 docker logs your_container_name로 볼 수 있다.
Jenkins 기능
로그인 및 계정 생성
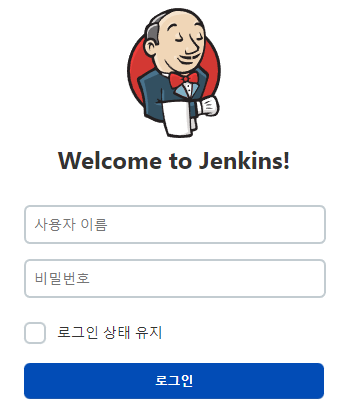
url을 요청하면 위와 같은 로그인 요청창이 뜬다.
관리자 이외의 개발자를 위한 계정 생성을 위한 방법은 크게 두 가지가 있다.
-
관리자가 계정을 생성하는 방법
-
직접 가입하는 방법
관리자 계정 생성
직접 가입
아이템 생성
플러그인
키 관리
Pipeline
Jenkinsfile 예시
pipeline {
    agent any

    triggers {
        pollSCM('*/3 * * * *') // 3분 주기로 실행
    }

    environment { // AWS 접근을 위한 키들
        AWS_ACCESS_KEY_ID = credentials('awsAccessKeyId')
        AWS_SECRET_ACCESS_KEY = credentials('awsSecretAccessKey')
        AWS_DEFAULT_REGION = 'ap-northeast-2'
        HOME = '.'
    }

    stages {
        stage('Prepare') { // download repository
            agent any

            steps {
                echo "Lets start Long Journey! ENV: ${ENV}"
                echo 'Clonning Repository'

                git url: 'https://github.com/frontalnh/temp.git',
                    branch: 'master',
                    credentials: 'gittest'
            }

            post {

                success { // if true
                    echo 'Successfully pull Repository'
                }

                always { // execute if not true
                    echo 'pull fail...'
                }

                cleanup { //finally
                    echo "after all other post condition"
                }
            }
        }

        // stage('Only for production') {
        //     when { // if for stage
        //         branch 'production' // if production branch
        //         environment name: 'APP_ENV', value: 'prod'
        //         anyOf { // or
        //             environment name: 'DEPLOY_TO', value: 'production'
        //             environment name: 'DEPLOY_TO', value: 'staging'
        //         }
        //     }
        // }

        stage('Deploy Frontend') {
            steps {
                echo 'Deploying Frontend'
                // 이전에 EC2 instance profile 등록 필요
                dir ('./website'){ // S3에 프론트엔드 정적 파일 업로드
                    sh '''
                    aws s3 sync ./ s3://jenkinsbuckettest2
                    '''
                }
            }

            post { // after step

                success {
                    echo 'Successfully Cloned Repository'

                    mail to: 'markkorea@naver.com',
                        subject: "Deploy Frontend Success",
                        body: "Successfully deployed frontend!"

                }
                failure {
                    echo 'I failed :('

                    mail to: 'markkorea@naver.com',
                        subject: "Failed Pipeline",
                        body: "Something is wrong with deploy frontend"

                }
            }
        }
        stage('Lint Backend') {
            // docker plugin + pipeline needed
            agent { // generate agent
                docker {
                    image 'node:latest'
                }
            }
            steps {
                dir ('./server') {
                    sh '''
                    npm install&&
                    npm run lint
                    '''
                }
            }
        }

        stage('Test Backend') {
            agent {
                docker {
                    image 'node:latest'
                }
            }
            steps {
                echo 'Test Backend'

                dir ('./server') {
                    sh '''
                    npm install
                    npm run test
                    '''
                }
            }
        }

        stage('Build Backend') {
            agent any
            steps {
                echo 'Build Backend'

                dir ('./server') {
                    sh """
                    docker build . -t server --build-arg env=${PROD}
                    """
                }
            }

            post {
                failutre {
                    error 'This pipeline stops here...' // error : stop pipeline
                }
            }
        }

        stage('Deploy Backend') {
            agent any

            steps {
                echo 'Build Backend'

                dir('./server') {
                    sh '''
                    docker run -p 80:80 -d server
                    '''
                }
            }

            post {
                success {
                    mail to: 'markkorea@naver.com',
                    subject: "Deploy Success",
                    body: "Successfully deployed!"
                }
            }
        }

    }

}
_articles/web/CI,CD/Jenkins 간단 설명 및 설치.md